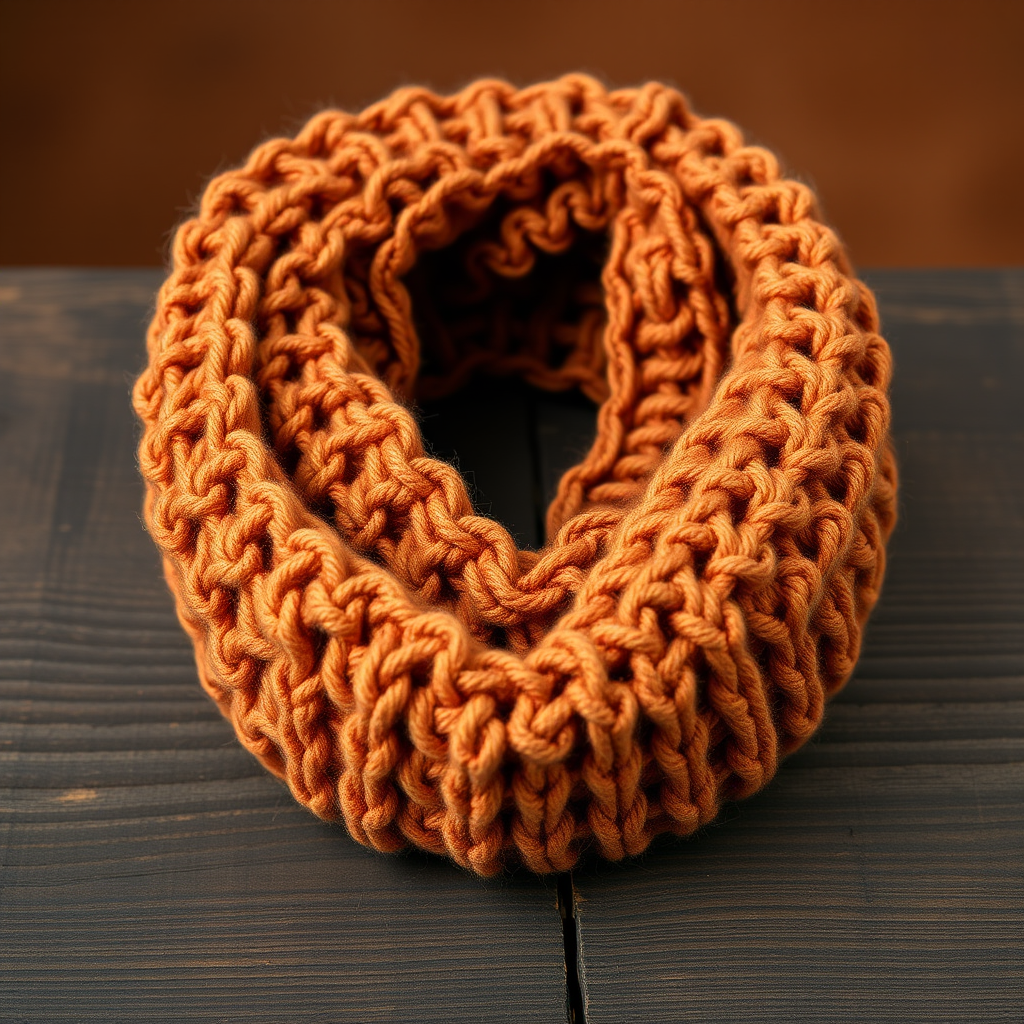
Lunar Tide Broomstick Lace Cowl Free Pattern – Knit a Celestial Wave Wrap

Lunar Tide Broomstick Lace Cowl: A Celestial Knitting Adventure
Imagine wrapping yourself in the hypnotic rhythm of moonlit waves, frozen in time by the ancient art of broomstick lace. The Lunar Tide Broomstick Lace Cowl is more than just a knitting pattern—it's a journey into the celestial ocean, where elongated loops mimic the gentle ebb and flow of tides under a silver moon. This stunning, seamless wrap transforms any outfit into a statement of artisanal craft, and the best part? It's completely free and beginner-friendly!
Whether you're a seasoned knitter looking to expand your repertoire or a curious beginner ready to dive into a new technique, this pattern offers a meditative, rhythmic experience that results in a breathtaking, gradient masterpiece. The combination of knitting and crochet creates a textured, honeycomb-like appearance that's both soft and highly tactile, with subtle shadows dancing across the loops like starlight on water.
Why You'll Love This Pattern
This cowl is a perfect project for those seeking something unique and visually striking. The gradient yarn does all the color work for you, transitioning from deep navy to soft silver and pale lavender, evoking the colors of a moonlit ocean. Worked in the round, it's seamless and reversible, making it a versatile accessory for any wardrobe. Plus, the broomstick lace technique, while impressive, is surprisingly simple once you get into the rhythm—making it an ideal project for adventurous beginners.
Materials Needed
Before you begin your celestial journey, gather these essential supplies:
- Yarn: Worsted weight gradient yarn (approx. 350 yards), such as Lion Brand Mandala in 'Thunderbird' or similar. The gradient transition is key to the celestial effect.
- Knitting Needle: US Size 10 (6mm) knitting needle for cast-on and bind-off
- Crochet Hook: US Size 10 (6mm) crochet hook for broomstick lace technique
- Large Broomstick Pin: Size 35 (19mm) knitting needle or large broomstick lace pin (this is crucial for creating the elongated loops)
- Stitch Marker: To mark the beginning of rounds
- Tapestry Needle: For weaving in ends
Gauge Information
4 broomstick lace repeats (each repeat = 5 loops) and 6 rows = 4 inches in pattern. Don't stress too much about gauge for a cowl—the stretchy nature of broomstick lace is forgiving—but it's good to check for consistency.
Abbreviations You'll Need
Familiarize yourself with these standard abbreviations before starting:
- CO: Cast on
- BO: Bind off
- K: Knit
- P: Purl
- ch: Chain
- sc: Single crochet
- st(s): Stitch(es)
- rnd(s): Round(s)
- Kfb: Knit into front and back of stitch (increase)
Step-by-Step Instructions: Your Celestial Journey Begins
Foundation Round
Using your US Size 10 knitting needle, CO 80 stitches. Place a stitch marker and join in the round, being very careful not to twist your stitches. Knit 2 rounds to establish a clean, stable edge. This foundation will be the base for your entire cowl, so take your time to ensure it's neat.
The Broomstick Lace Pattern (Worked in Rounds)
Round 1 (Loop Pull Round): This is where the magic begins! Switch to your crochet hook. Insert the hook into the first stitch on your knitting needle as if to knit. Yarn over and pull up a loop, then place that loop onto your large broomstick pin (the 19mm needle). Repeat this process for each of the 80 stitches, pulling up a loop from each stitch and placing it onto the large pin. When you're done, you'll have 80 beautiful, elongated loops resting on your broomstick pin. This is the foundation of the wave pattern.
Round 2 (Knit Off Round): Carefully slide all 80 loops off the large pin onto your US Size 10 knitting needle, being cautious not to twist them. Now, working with your crochet hook, insert it through the first 5 loops as a group. Yarn over and pull through all 5 loops, then chain 1 to secure. Repeat this process across all 80 loops, working in groups of 5. You'll create 16 groups of 5 loops total. After completing all groups, you'll have 16 stitches on your knitting needle (each group counts as one stitch). This is the honeycomb effect taking shape!
Round 3: Knit all 16 stitches. Simple and grounding after the loop work.
Round 4: Repeat Round 1, but this time pull up a loop from each of the 16 stitches, placing them onto your large broomstick pin. You'll have 16 loops—a more intimate wave pattern.
Round 5: Repeat Round 2, but now work in groups of 4 loops (since you have 16 loops, you'll create 4 groups of 4). After this round, you'll have 4 stitches on your knitting needle. The pattern is narrowing beautifully.
Round 6: Knit all 4 stitches.
Round 7: Repeat Round 1, pulling up a loop from each of the 4 stitches. You'll have 4 loops on your pin.
Round 8: Repeat Round 2, working all 4 loops together as one group. After this round, you'll have just 1 stitch on your knitting needle. This is the peak of your wave!
Round 9: Knit the single stitch. Take a moment to admire the beautiful point you've created.
Round 10 (Increase Round): Now we expand back out. Knit into the front and back (Kfb) of the single stitch to make 2 stitches. Then, continue increasing by knitting into the front and back of each stitch until you have 16 stitches again. (To do this: Kfb, then Kfb into the next stitch, repeat until you have 16 stitches.) This creates the expanding wave that mirrors the narrowing.
Round 11: Repeat Round 1, pulling up a loop from each of the 16 stitches. You'll have 16 loops on your pin.
Round 12: Repeat Round 2, working in groups of 5 loops. You'll have 3 groups of 5 and 1 group of 1. To keep the pattern consistent, work the last group of 1 as a single loop (insert hook through the loop, yarn over, pull through, chain 1). After this round, you'll have 16 stitches on your knitting needle.
Round 13: Knit all stitches. This completes one full wave cycle!
Repeating the Pattern
Repeat Rounds 1-13 until your cowl measures approximately 10 inches from the cast-on edge, ending with a Round 13. This will give you a beautiful, flowing wave pattern that cascades around your neck. The rhythm becomes meditative—you'll find yourself lost in the motion of pulling loops and knitting them off.
Finishing Touches
BO all stitches loosely using your US Size 10 knitting needle. Important: Don't bind off too tightly, or your cowl won't have the drape it needs. Weave in all ends with your tapestry needle, being sure to secure them well. Block the cowl gently to open up the lace pattern—this step is crucial for showcasing the beautiful wave structure. Simply wet the cowl, gently squeeze out excess water, and lay it flat to dry, shaping it as desired.
Wear and Enjoy Your Creation
Wrap the Lunar Tide Cowl around your neck twice for a cozy, layered look that's perfect for chilly evenings, or let it drape once for a dramatic, flowing silhouette that's sure to turn heads. The gradient transition from deep navy to soft silver and pale lavender makes this cowl a true conversation piece—a wearable work of art that captures the mystery and beauty of the moonlit ocean.
This pattern is perfect for gifting, too. Imagine the joy on a loved one's face when they receive a handcrafted cowl that looks like it was plucked from the sea under a full moon. The combination of knitting and crochet techniques makes it an excellent project for learning new skills, and the forgiving nature of the pattern means even beginners can achieve stunning results.
So grab your yarn, your hooks, and your needles, and let the rhythmic waves of the Lunar Tide carry you away. Happy crafting, and may your stitches always be blessed by the moon's gentle glow!