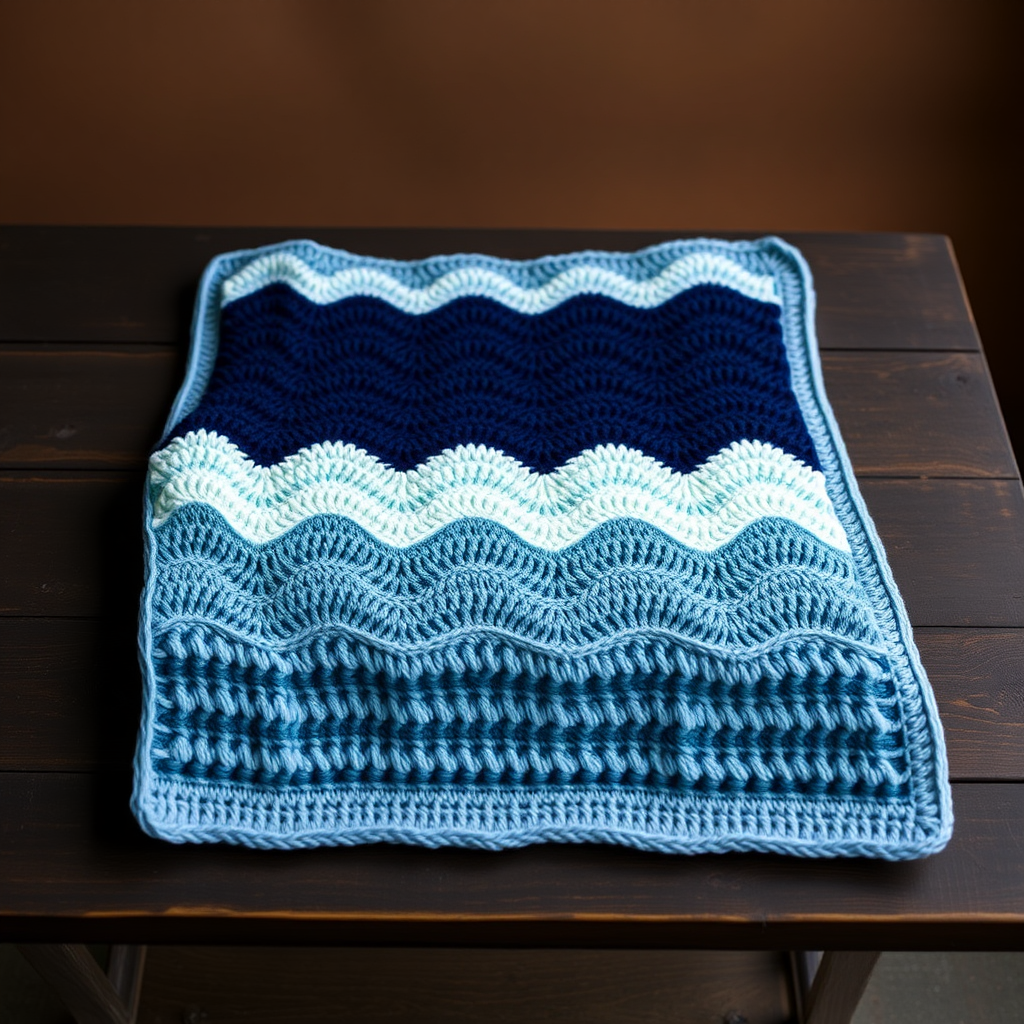
Highland Stone Ripple Afghan Free Pattern – Textured Masculine Knit Throw

The Highland Stone Ripple Afghan: A Rugged, Textured Knit Throw for Modern Masculine Spaces
Are you searching for a knitting project that combines classic structure with a modern, sophisticated aesthetic? Look no further than the Highland Stone Ripple Afghan. This isn't your grandmother's ripple blanket—it's a rugged, contemporary throw designed for cozy masculine spaces, featuring deep chevron ridges and a unique slipped-stitch texture that adds depth and warmth. The heathered slate palette of charcoal, storm grey, and pewter creates a subtle, sophisticated ombre effect that feels both handcrafted and refined.
This free pattern is perfect for intermediate knitters looking to expand their skills, but with clear instructions, even a confident beginner can tackle this rewarding project. The result is a dense, cozy, and substantial throw that will become a staple in your living room for years to come. Let's dive into the pattern and create something truly special.
Materials Needed: Gathering Your Supplies
Before you begin, ensure you have all the necessary materials. The quality of your yarn will directly impact the final look and feel of your afghan, so choose wisely.
Yarn
You will need worsted weight yarn in three distinct colors. The pattern calls for approximately 1800 grams total. Here's the breakdown:
- Color A (Charcoal Heather): 800 grams – This is your main color, used for the cast-on, border, and the base of the ripple pattern.
- Color B (Storm Grey): 600 grams – This provides the mid-tone contrast.
- Color C (Pewter): 400 grams – This is your lightest shade, adding the final layer of depth.
Pro Tip: Choose yarns with good stitch definition to showcase the slipped-stitch texture. A wool or wool-blend will block beautifully and give you that crisp chevron shape.
Needles & Gauge
- Needle: US 9 (5.5mm) 32-inch circular knitting needle. The circular needle is essential to hold the large number of stitches comfortably, but you will be working flat, back and forth.
- Gauge: 16 stitches and 24 rows = 4 inches in stockinette stitch (blocked). Always knit a gauge swatch first! This ensures your finished afghan matches the intended dimensions.
Other Supplies
- Tapestry needle for weaving in ends
- Stitch markers (optional, but helpful for keeping track of pattern repeats)
- Blocking mats and pins
Step-by-Step Instructions: Knitting Your Highland Stone Ripple
This pattern is worked flat on a circular needle. The magic lies in the combination of increases and decreases that form the ripple, paired with slipped stitches that create a subtle woven texture. Let's break it down.
Pattern Notes & Abbreviations
- k: knit
- p: purl
- k2tog: knit two stitches together (a right-leaning decrease)
- yo: yarn over (an increase that creates a small hole)
- sl1 wyib: slip one stitch purlwise with the yarn in back. This is the key to the texture!
- RS: right side
- WS: wrong side
Important: The pattern is a multiple of 14 + 2 stitches. You will cast on 156 stitches, which fits this formula perfectly (14 x 11 = 154 + 2 = 156).
Getting Started: Cast On & Set-Up
Step 1: Cast On
With Color A, cast on 156 stitches loosely. A loose cast-on is crucial to prevent the bottom edge from pulling in and distorting the ripple points. Consider using a larger needle for the cast-on or a stretchy method like the long-tail cast-on.
Step 2: Set-up Row (WS)
Purl all stitches. This creates a clean base for your pattern.
The Ripple Pattern: Rows 1-8
Now you'll begin the main pattern. You will repeat these 8 rows until your afghan reaches the desired length. Pay close attention to the color changes and the slipped stitches.
Row 1 (RS): With Color A
k2, *k2tog, k2tog, (k1, yo) twice, k1, k2tog, k2tog, k1; repeat from * to last 2 sts, k2.
Explanation: The two k2tog at the start and end of the repeat create the "valleys" of your ripple. The (k1, yo) twice creates two new stitches, forming the "peaks." This is what gives the chevron its shape.
Row 2 (WS): With Color A
Purl all stitches.
Row 3 (RS): With Color B
k2, *sl1 wyib, k1, sl1 wyib, k1, yo, k1, yo, k1, sl1 wyib, k1, sl1 wyib, k1; repeat from * to last 2 sts, k2.
Explanation: This is where the magic happens. You are slipping stitches over the decrease/increase points from Row 1. The slipped stitches will create a raised, woven ridge that runs diagonally along the chevron, adding that sophisticated texture.
Row 4 (WS): With Color B
Purl all stitches.
Row 5 (RS): With Color C
k2, *k1, sl1 wyib, k1, sl1 wyib, k1, yo, k1, yo, k1, sl1 wyib, k1, sl1 wyib, k1; repeat from * to last 2 sts, k2.
Explanation: Notice how the slipped stitches are offset by one compared to Row 3. This creates a staggered, brick-like texture that adds even more visual interest.
Row 6 (WS): With Color C
Purl all stitches.
Row 7 (RS): With Color A
Repeat Row 1.
Row 8 (WS): With Color A
Purl all stitches.
Continuing the Pattern
Repeat Rows 1-8 for the entire length of the afghan, maintaining the color sequence: A, B, C, A, B, C.... Continue until the piece measures approximately 60 inches from the cast-on edge. It's best to end with a Row 8 (a WS row) to have a clean edge for the border.
Adding the Border
Step 1: With Color A, knit 4 rows of garter stitch (knit every row) across all 156 stitches. This simple border frames the textured ripple beautifully and prevents the edges from curling.
Step 2: Bind off all stitches loosely knitwise. Again, a loose bind-off is essential to maintain the stretch and shape of the wavy edge.
Finishing Touches: Weaving & Blocking
Step 1: Weave in Ends
Using your tapestry needle, carefully weave in all loose ends on the wrong side of the work. Take your time to ensure they are secure and invisible from the front.
Step 2: Blocking (Crucial!)
Blocking is what transforms this from a wavy piece of knitting into a stunning, structured throw. Soak the afghan in lukewarm water with a gentle wool wash. Gently squeeze out excess water (do not wring). Lay it flat on blocking mats.
Step 3: Pin to Shape
Pin the afghan out to the final dimensions of 52 inches wide x 60 inches long. This is the most important step for the ripple pattern. Pin out the ripple points to sharpen the chevron peaks and valleys. This will define the shape and make the texture pop. Allow it to dry completely before removing the pins.
Once dry, your Highland Stone Ripple Afghan is ready to be draped over a sofa, folded at the foot of a bed, or gifted to someone special. The combination of the rugged texture, masculine color palette, and classic ripple shape creates a timeless piece that is both modern and heirloom-quality. Happy knitting!