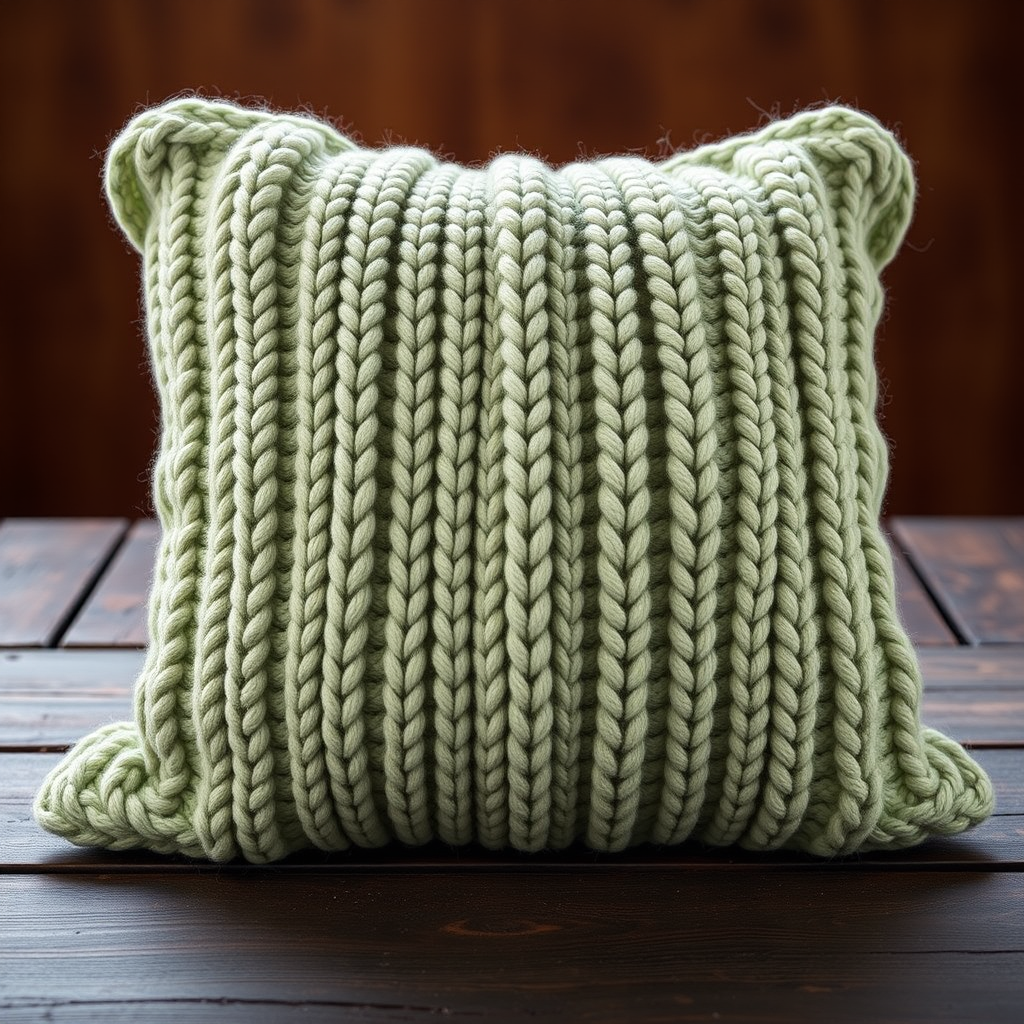
Heirloom Buttoned Embossed Pillow Free Pattern – A Knitted Vintage Garden Treasure

Heirloom Buttoned Embossed Pillow Free Pattern – A Knitted Vintage Garden Treasure
Wrap your living space in timeless charm with this richly textured pillow, featuring an intricate embossed diamond lattice and heirloom-style wooden buttons. Knitted in soft, heathered ivory yarn, it brings a cozy, nostalgic elegance to any room. This free knitting pattern is perfect for intermediate knitters looking to add a statement piece to their home decor—and the result looks like a treasured family heirloom passed down through generations.
This pillow cover is knitted flat in two identical panels, then seamed together with a buttoned flap on one side. Each panel features a central embossed diamond lattice pattern framed by seed stitch borders. The combination of cables and purl textures creates a raised, dimensional surface that catches the light beautifully, reminiscent of vintage linens and classic cottage style.
Materials Needed
Before you begin, gather the following supplies to ensure a smooth knitting experience:
- Yarn: Worsted weight yarn in heathered ivory (approx. 450 yards), e.g., Lion Brand Wool-Ease or any similar worsted weight blend
- Knitting Needles: US 7 (4.5 mm) knitting needles
- Cable Needle: For creating the embossed diamond lattice cables
- Stitch Markers: 2 markers to delineate the pattern section
- Tapestry Needle: For weaving in ends and seaming panels
- Four Wooden Buttons: Approximately 1 inch in diameter, rustic or heirloom style
- Pillow Form: 18 x 18 inch square pillow insert
Gauge: 20 stitches x 28 rows = 4 inches in stockinette stitch. Always knit a gauge swatch first to ensure your finished pillow measures correctly. Adjust needle size if necessary to match gauge.
Step-by-Step Instructions
Abbreviations
- K = knit
- P = purl
- C6F = cable 6 front (slip 3 stitches to cable needle, hold in front, knit next 3 stitches, then knit 3 from cable needle)
- C6B = cable 6 back (slip 3 stitches to cable needle, hold in back, knit next 3 stitches, then knit 3 from cable needle)
- RS = right side
- WS = wrong side
Panel (Make 2)
Cast on 80 stitches.
Seed Stitch Border
Rows 1-6: Work in seed stitch: *K1, P1* repeat to end, ending with K1. (This creates a 6-row border around the entire panel.)
Setting Up the Pattern
Row 7 (Right Side): Seed stitch over first 8 stitches, place marker, work Row 1 of Diamond Lattice Chart over next 64 stitches, place marker, seed stitch over last 8 stitches.
Diamond Lattice Chart (worked over 64 stitches)
Row 1 (RS): P2, K6, P2, K6, P2, K6, P2, K6, P2, K6, P2, K6, P2, K6, P2, K6, P2
Row 2 (WS): K2, P6, K2, P6, K2, P6, K2, P6, K2, P6, K2, P6, K2, P6, K2, P6, K2
Row 3: P2, C6F (slip 3 stitches to cable needle, hold in front, knit next 3 stitches, then knit 3 from cable needle), P2, C6B (slip 3 stitches to cable needle, hold in back, knit next 3 stitches, then knit 3 from cable needle), repeat across, ending with P2.
Row 4: Same as Row 2.
Row 5: P2, K6, P2, K6, P2, K6, P2, K6, P2, K6, P2, K6, P2, K6, P2, K6, P2
Row 6: Same as Row 2.
Row 7: P2, C6B, P2, C6F, repeat across, ending with P2.
Row 8: Same as Row 2.
Repeat Rows 1-8 until piece measures approximately 18 inches from cast-on edge, ending with a Row 8 (wrong side row).
Buttonhole Flap (on one panel only)
This flap creates the buttoned closure on one side of the pillow. Complete this section on only one of your two panels.
Step 1: Work in seed stitch for 10 rows across all 80 stitches.
Step 2 (Buttonhole Row - Right Side): Work seed stitch over first 8 stitches, then bind off 4 stitches, continue in seed stitch to end of row.
Step 3 (Next Row - Wrong Side): Work in seed stitch across, and when you reach the bound-off gap, cast on 4 stitches over the gap using the cable cast-on method. Continue in seed stitch to end of row.
Step 4: Work 6 more rows in seed stitch across all 80 stitches.
Step 5: Bind off all stitches loosely. This completes the buttonhole flap panel.
Finishing
Step 1 - Blocking: Block both panels to 18 inches square. Wet blocking is recommended for worsted weight yarn to even out the cable stitches and ensure crisp, professional-looking edges. Pin panels to measurements and allow to dry completely.
Step 2 - Seaming: Place panels with right sides together, aligning the buttonhole flap on top. Using a tapestry needle and matching yarn, sew three sides together using a mattress stitch or whip stitch, leaving the buttonhole side open.
Step 3 - Turn and Insert: Turn the pillow cover right side out through the open buttonhole side. Gently push out the corners for a crisp finish. Insert the 18 x 18 inch pillow form through the opening.
Step 4 - Button Placement: Fold the buttonhole flap over the back panel. Mark button positions on the back panel to align with the buttonholes. Sew 4 wooden buttons securely in place, matching the buttonhole positions.
Step 5 - Button the Flap: Button the flap closed, and your heirloom pillow is complete!
Tips for Success
- Keep your tension consistent throughout the cable sections—cables naturally pull in, so blocking is essential to achieve the correct 18-inch square dimensions.
- Use stitch markers to clearly separate the seed stitch borders from the central pattern. This prevents accidental pattern drift.
- Count your stitches after each cable row to catch any mistakes early. The pattern repeat is 8 stitches (P2, K6), so the 64-stitch section should contain exactly 8 repeats.
- Choose buttons that complement the ivory yarn—dark wooden buttons create a beautiful contrast and enhance the vintage aesthetic.
This heirloom buttoned embossed pillow is a wonderful project that combines classic cable techniques with modern home decor appeal. The finished piece makes a thoughtful handmade gift or a stunning addition to your own living space. Enjoy the process, and treasure the result for years to come!