Enchanted Orb Spiderweb Doily Free Pattern – A Crocheted Moonlit Web
Enchanted Orb Spiderweb Doily Free Pattern – A Crocheted Moonlit Web
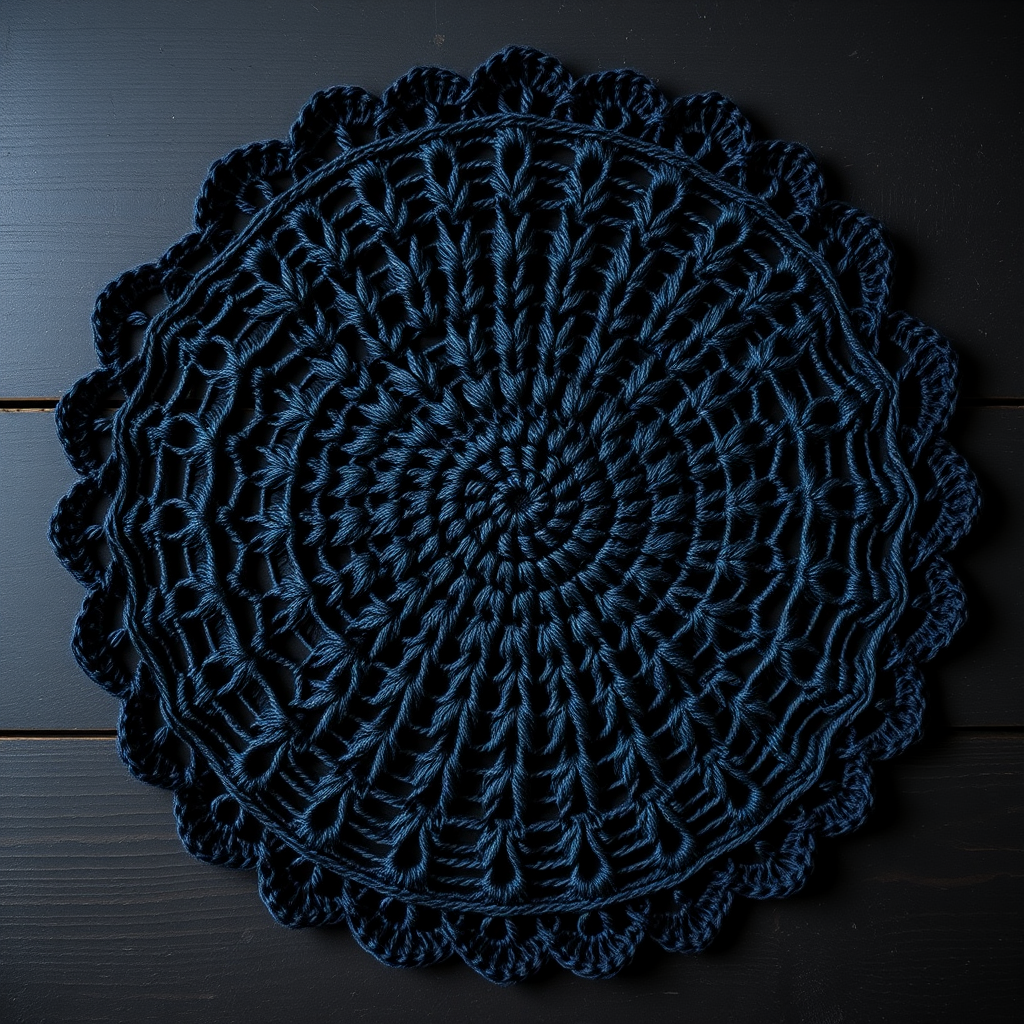
As the autumn nights grow longer and the veil between worlds thins, there's no better time to infuse your home with a touch of gothic elegance. This Halloween, step away from the plastic skeletons and create something truly hauntingly beautiful: the Enchanted Orb Spiderweb Doily. This free crochet pattern weaves classic stitches into a delicate yet sturdy centerpiece that captures the eerie elegance of a moonlit forest. Whether draped over a dark wooden table or adorning a wall, this lace doily elevates any autumnal decor from ordinary to spellbinding.
Designed for intermediate beginners and seasoned crocheters alike, this pattern is worked in continuous rounds from the center outward, creating a perfectly circular web of radiating shells and chain loops. The dense center gradually transitions into airy, open lace, mimicking a spider's web glistening with dew under a full moon. Grab your hook, and let's spin some magic.
Materials Needed
Before you begin your crafting journey, gather the following materials. The quality of your yarn will significantly impact the final drape and structure of your doily.
- Yarn: Worsted weight cotton yarn in black (e.g., Lion Brand 24/7 Cotton) – approximately 250 yards. Cotton is recommended for its crisp stitch definition and structured drape, which is essential for a doily that lays flat.
- Crochet Hook: 4.0 mm (G/6) crochet hook. Ensure your hook is comfortable in your hand, as you'll be working many stitches.
- Stitch Markers: To track the start of each round.
- Yarn Needle: For weaving in the ends neatly.
- Blocking Mat & Pins: To block your finished doily for a professional, crisp finish.
- Spray Bottle with Water: For the blocking process.
Gauge: First 5 rounds = 3 inches in diameter. Gauge is not critical for this project, but maintaining consistent tension ensures a flat, even doily without ruffling or cupping.
Step-by-Step Instructions
This spiderweb doily is worked in continuous rounds from the center outward. Use a stitch marker to track the start of each round. Let's begin.
Round 1: The Magical Center
Make a magic ring. Work 12 double crochet (dc) into the ring. Pull the tail tight to close the center hole completely. Join with a slip stitch (sl st) to the first dc. (12 dc)
Round 2: Expanding the Core
Ch 3 (this counts as your first dc), 1 dc in the same stitch (this is an increase). Now, work 2 dc in each stitch around. Join with a sl st to the top of the ch-3. (24 dc)
Round 3: Building the Foundation
Ch 3, 1 dc in the same stitch, 1 dc in the next stitch. *2 dc in the next stitch, 1 dc in the next stitch* — repeat from * to * around. Join with a sl st. (36 dc)
Round 4: Creating the First Web Loops
Ch 1, 1 single crochet (sc) in the same stitch. *Ch 5, skip 2 stitches, 1 sc in the next stitch* — repeat from * to * around, ending with ch 5, skip 2 stitches. Join with a sl st to the first sc. (12 chain loops)
Round 5: Forming the First Shells
Slip stitch into the first chain loop. Ch 3, 4 dc in the same loop. *Ch 2, 5 dc in the next loop* — repeat from * to * around, ending with ch 2. Join with a sl st to the top of the ch-3. (12 shell clusters)
Round 6: Weaving the Large Loops
Slip stitch to the space between the 3rd and 4th dc of the first shell. Ch 1, 1 sc in that space. *Ch 7, 1 sc in the space between the 3rd and 4th dc of the next shell* — repeat from * to * around, ending with ch 7. Join with a sl st to the first sc. (12 large loops)
Round 7: Growing the Shells
Slip stitch into the first large loop. Ch 3, 6 dc in the same loop. *Ch 3, 7 dc in the next loop* — repeat from * to * around, ending with ch 3. Join with a sl st to the top of the ch-3. (12 larger shells)
Round 8: Expanding the Web
Slip stitch to the space between the 4th and 5th dc of the first shell. Ch 1, 1 sc in that space. *Ch 9, 1 sc in the space between the 4th and 5th dc of the next shell* — repeat from * to * around, ending with ch 9. Join with a sl st to the first sc. (12 extra-large loops)
Round 9: The Final Shells
Slip stitch into the first extra-large loop. Ch 3, 8 dc in the same loop. *Ch 4, 9 dc in the next loop* — repeat from * to * around, ending with ch 4. Join with a sl st to the top of the ch-3. (12 final shells)
Round 10: The Enchanted Edging
Ch 1, 1 sc in the same stitch. *Ch 3, skip 1 stitch, 1 sc in the next stitch* — repeat from * to * across the top of each shell. In each ch-4 space, work (1 sc, ch 3, 1 sc). Join with a sl st to the first sc. Fasten off and weave in all ends securely.
Blocking: The Final Touch of Magic
To achieve a crisp, flat doily that truly showcases the intricate lace pattern, blocking is essential. Pin the doily to a blocking mat, gently stretching it into a perfect circle. Spray generously with water until damp. Allow it to dry completely. This process opens up the chain loops and shells, giving your doily a professional, polished finish that will look stunning in your Halloween decor.
Your Enchanted Orb Spiderweb Doily is now complete. Place it on a dark wooden table with a candle flickering beneath it, or hang it on a wall to cast eerie, beautiful shadows. This piece is a testament to the timeless art of crochet, blending classic technique with seasonal charm. Happy haunting, and even happier crocheting!


