Celestial Slumber Cloud Amigurumi Free Pattern – Knit a Dreamy Night Sky Companion
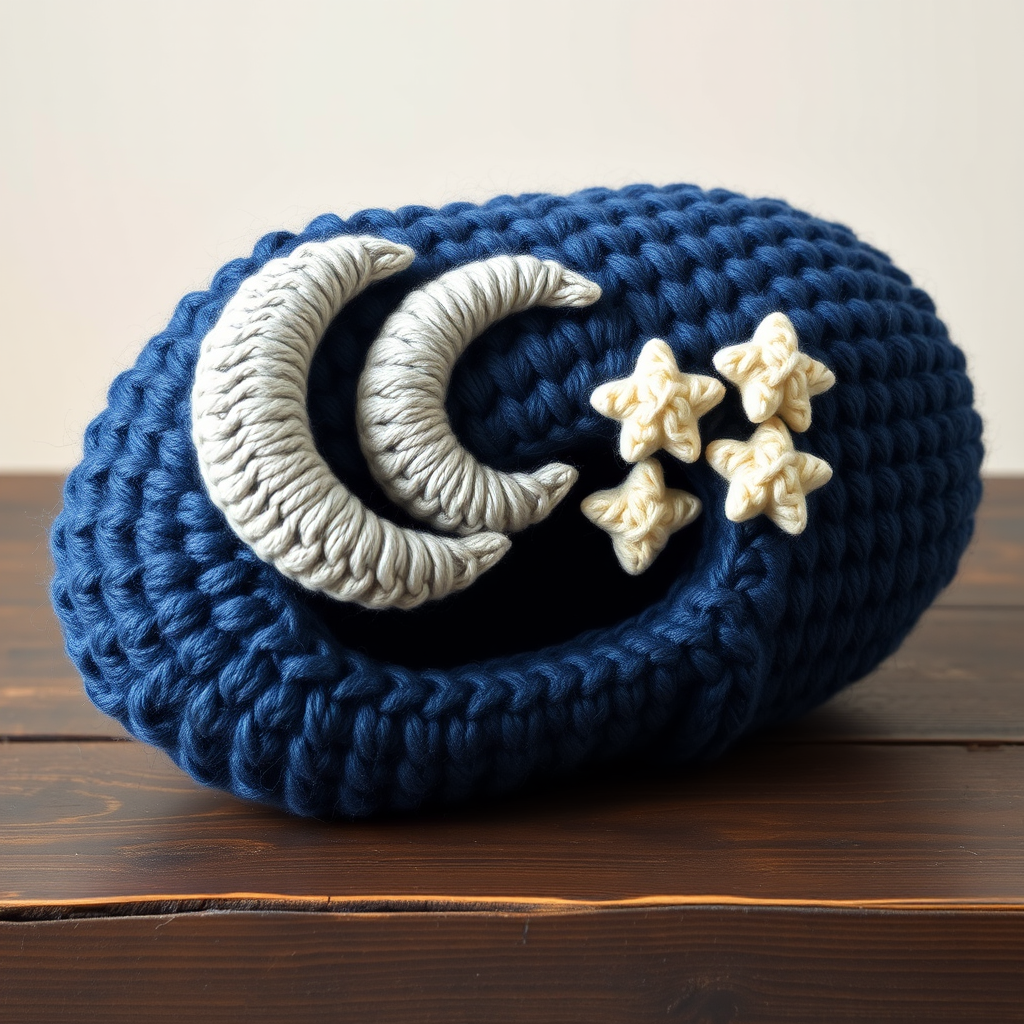
Celestial Slumber Cloud Amigurumi: Knit a Dreamy Night Sky Companion
Wrap yourself in the serenity of a starry night with this cloud-soft amigurumi, featuring a crescent moon and twinkling stars in a palette of midnight blues and silver. This cozy companion is perfect for nurseries, meditation spaces, or as a whimsical gift that brings calm to any room. Whether you're a seasoned knitter or just starting your amigurumi journey, this pattern is designed to be approachable and rewarding, resulting in a huggable piece of celestial art.
Materials Needed
Before you begin, gather the following supplies to ensure a smooth and enjoyable crafting experience:
- Yarn: Worsted weight yarn in three colors:
- Midnight Blue (MC) – for the cloud body
- Soft Silver (SC) – for the crescent moon
- Cream (CC) – for the stars
- Needles: US 6 (4.0 mm) knitting needles. For a crochet version, use a US 6 (4.0 mm) crochet hook.
- Notions: Tapestry needle for sewing pieces together, fiberfill stuffing for a plush finish, and stitch markers to keep track of your rows.
Gauge & Abbreviations
Gauge: 5 stitches and 7 rows = 4 inches in stockinette stitch (knitting) or 4 sc = 1 inch (crochet). Gauge is important for achieving the correct size, but for this project, a slight variation won't ruin the charm.
Abbreviations:
- K: knit
- P: purl
- K2tog: knit two together (decrease)
- M1: make one (increase)
- St st: stockinette stitch (knit on right side, purl on wrong side)
- For crochet: ch (chain), sc (single crochet), inc (2 sc in same stitch), dec (sc2tog)
Step-by-Step Instructions
This pattern is written for knitting, but you can easily adapt to crochet using single crochet stitches. Work in continuous rounds unless noted. Let's begin crafting your celestial companion!
Cloud Body (Make 2 Pieces, Then Sew Together)
The cloud is worked flat in a simple stockinette stitch, with decreases shaping the top to create a fluffy, rounded silhouette. You'll make two identical pieces and seam them together.
- Cast On: Using MC, cast on 30 stitches.
- Row 1 (RS): K across.
- Row 2: P across.
- Rows 3-20: Repeat rows 1-2 for 20 rows total. You will have 10 garter stitch ridges on the right side.
- Shape the Cloud (Decreases): Now we'll decrease to form the rounded top.
- Row 21: K2tog, K26, K2tog (28 sts)
- Row 22: P across
- Row 23: K2tog, K24, K2tog (26 sts)
- Row 24: P across
- Row 25: K2tog, K22, K2tog (24 sts)
- Row 26: P across
- Row 27: K2tog, K20, K2tog (22 sts)
- Row 28: P across
- Row 29: K2tog, K18, K2tog (20 sts)
- Row 30: P across
- Row 31: K2tog, K16, K2tog (18 sts)
- Row 32: P across
- Row 33: K2tog, K14, K2tog (16 sts)
- Row 34: P across
- Row 35: K2tog, K12, K2tog (14 sts)
- Row 36: P across
- Row 37: K2tog, K10, K2tog (12 sts)
- Row 38: P across
- Row 39: K2tog, K8, K2tog (10 sts)
- Row 40: P across
- Row 41: K2tog, K6, K2tog (8 sts)
- Row 42: P across
- Row 43: K2tog, K4, K2tog (6 sts)
- Row 44: P across
- Row 45: K2tog, K2, K2tog (4 sts)
- Row 46: P across
- Row 47: K2tog, K2tog (2 sts)
- Row 48: K2tog (1 st). Cut yarn, pull through the last loop to secure.
- Make a Second Piece: Repeat steps 1-6 identically to create the second cloud piece.
- Seam and Stuff: Place the two pieces together with right sides facing out. Using a tapestry needle and MC yarn, whip stitch or mattress stitch along the edges, leaving a 2-inch opening. Turn the cloud right side out (if needed), stuff firmly with fiberfill, then close the opening with a neat seam. Your cloud should be a rounded, fluffy oval shape.
Crescent Moon (Knit Flat)
The moon is worked flat with increases to widen, then decreases to create the crescent curve. It's a fun, sculptural piece that adds magic to your cloud.
- Cast On: Using SC, cast on 10 stitches.
- Increase Section: We'll increase at both edges every other row.
- Row 1: K across
- Row 2: K1, M1, K8, M1, K1 (12 sts)
- Row 3: K across
- Row 4: K1, M1, K10, M1, K1 (14 sts)
- Row 5: K across
- Row 6: K1, M1, K12, M1, K1 (16 sts)
- Row 7: K across
- Row 8: K1, M1, K14, M1, K1 (18 sts)
- Row 9: K across
- Row 10: K1, M1, K16, M1, K1 (20 sts)
- Row 11: K across
- Row 12: K1, M1, K18, M1, K1 (22 sts)
- Row 13: K across
- Row 14: K1, M1, K20, M1, K1 (24 sts)
- Row 15: K across
- Row 16: K1, M1, K22, M1, K1 (26 sts)
- Row 17: K across
- Row 18: K1, M1, K24, M1, K1 (28 sts)
- Row 19: K across
- Row 20: K1, M1, K26, M1, K1 (30 sts)
- Row 21: K across
- Row 22: K1, M1, K28, M1, K1 (32 sts)
- Row 23: K across
- Row 24: K1, M1, K30, M1, K1 (34 sts)
- Row 25: K across
- Shape the Crescent (Decreases): Now we'll decrease to create the curved crescent shape.
- Row 26: K1, K2tog, K28, K2tog, K1 (32 sts)
- Row 27: K across
- Row 28: K1, K2tog, K26, K2tog, K1 (30 sts)
- Row 29: K across
- Row 30: K1, K2tog, K24, K2tog, K1 (28 sts)
- Row 31: K across
- Row 32: K1, K2tog, K22, K2tog, K1 (26 sts)
- Row 33: K across
- Row 34: K1, K2tog, K20, K2tog, K1 (24 sts)
- Row 35: K across
- Row 36: K1, K2tog, K18, K2tog, K1 (22 sts)
- Row 37: K across
- Row 38: K1, K2tog, K16, K2tog, K1 (20 sts)
- Row 39: K across
- Row 40: K1, K2tog, K14, K2tog, K1 (18 sts)
- Row 41: K across
- Row 42: K1, K2tog, K12, K2tog, K1 (16 sts)
- Row 43: K across
- Row 44: K1, K2tog, K10, K2tog, K1 (14 sts)
- Row 45: K across
- Row 46: K1, K2tog, K8, K2tog, K1 (12 sts)
- Row 47: K across
- Row 48: K1, K2tog, K6, K2tog, K1 (10 sts)
- Row 49: K across
- Row 50: K1, K2tog, K4, K2tog, K1 (8 sts)
- Row 51: K across
- Row 52: K1, K2tog, K2, K2tog, K1 (6 sts)
- Row 53: K across
- Row 54: K1, K2tog, K2tog, K1 (4 sts)
- Row 55: K across
- Row 56: K2tog, K2tog (2 sts)
- Row 57: K2tog (1 st). Cut yarn, pull through.
- Shape and Stuff: Fold the piece in half lengthwise, with the right side facing out. Sew the long edges together using SC yarn, leaving a small opening. Stuff lightly with fiberfill, then close the opening. To create the crescent curve, gently bend the piece into a half-moon shape and sew the two ends together, forming a curved crescent.
Stars (Make 3)
These little stars are quick to knit and add the perfect twinkle to your night sky. They're worked flat with increases and decreases to create a puffy, dimensional star.
- Cast On: Using CC, cast on 5 stitches.
- Increase Section:
- Row 1: K across
- Row 2: K1, M1, K3, M1, K1 (7 sts)
- Row 3: K across
- Row 4: K1, M1, K5, M1, K1 (9 sts)
- Row 5: K across
- Row 6: K1, M1, K7, M1, K1 (11 sts)
- Row 7: K across
- Row 8: K1, M1, K9, M1, K1 (13 sts)
- Row 9: K across
- Row 10: K1, M1, K11, M1, K1 (15 sts)
- Row 11: K across
- Row 12: K1, M1, K13, M1, K1 (17 sts)
- Row 13: K across
- Row 14: K1, M1, K15, M1, K1 (19 sts)
- Row 15: K across
- Row 16: K1, M1, K17, M1, K1 (21 sts)
- Row 17: K across
- Row 18: K1, M1, K19, M1, K1 (23 sts)
- Row 19: K across
- Row 20: K1, M1, K21, M1, K1 (25 sts)
- Row 21: K across
- Row 22: K1, M1, K23, M1, K1 (27 sts)Also Check Out: We think you'd love this beautiful pattern on our sister site: The Bohemian Fringe Bag Free Pattern



