The Whispering Pines Cardigan: A Free Knitting Pattern for a Textured, Asymmetric Cocoon Coat
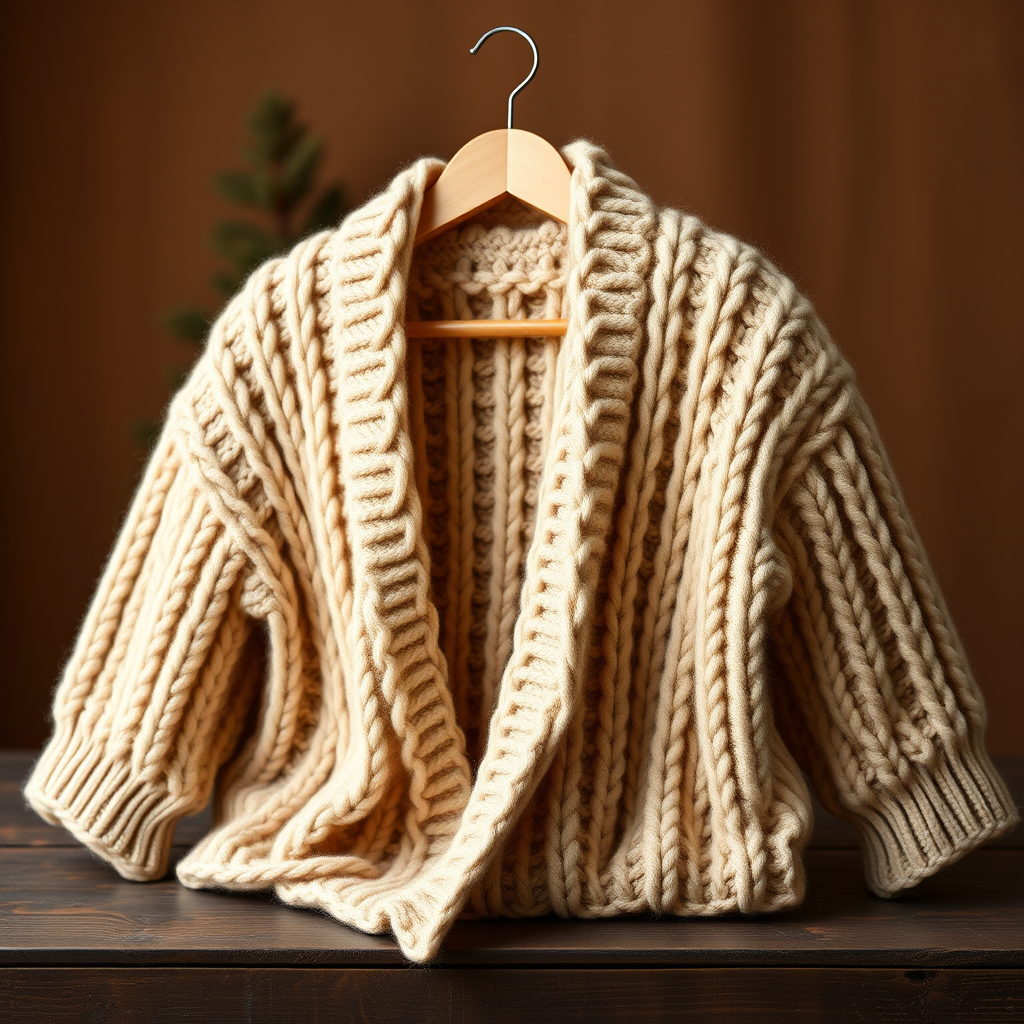
Wrap Yourself in Comfort: The Whispering Pines Cardigan
There are some knitting projects that are more than just garments—they are experiences. The Whispering Pines Cardigan is one of those patterns. Designed to evoke the quiet, serene beauty of a forest walk, this asymmetric cocoon coat combines the soothing rhythm of moss stitch with the architectural intrigue of slipped stitch ridges. The result is a modern, oversized silhouette that feels like a warm hug on a chilly day. Whether you are curling up with a book or heading out for a crisp autumn stroll, this cardigan is your perfect companion. Best of all, this is a free knitting pattern that is surprisingly beginner-friendly, thanks to its simple repeats and forgiving shape.
Materials Needed
Before you begin, gather the following supplies. The pattern uses a worsted weight yarn (Category 4) for a cozy, substantial fabric. The sample shown uses Lion Brand Wool-Ease in 'Fisherman' (MC) and 'Oatmeal' (CC), but any similar yarn will work beautifully.
- Yarn: Worsted weight (Category 4) yarn. Approximate yardage: 1200 (1350, 1500, 1650) yards. You will need a Main Color (MC) and a Contrast Color (CC).
- Needles:
- US Size 8 (5.0 mm) circular knitting needles, 32-inch or longer (for magic loop or working flat).
- US Size 7 (4.5 mm) circular needles for ribbing.
- Other: Stitch markers, tapestry needle for weaving ends, scissors.
- Gauge: 18 stitches and 24 rows = 4 inches in Moss Stitch pattern on larger needles, after blocking. Always check your gauge to ensure the correct fit.
Step-by-Step Instructions
This pattern is worked in one piece from side to side, creating the unique asymmetric shape. The slipped stitch ridges are worked with the Contrast Color (CC), while the main body is in the Main Color (MC). Follow these detailed instructions carefully, and you will have a stunning cardigan in no time.
Sizes and Fit
Sizes: S/M (M/L, L/XL, 2X/3X). Finished Bust: 44 (48, 52, 56) inches. Designed for 4-6 inches of positive ease. Choose the size that gives you the desired amount of room.
Abbreviations
- CO: Cast on
- BO: Bind off
- k: knit
- p: purl
- sl1 wyif: slip 1 stitch purlwise with yarn in front
- sl1 wyib: slip 1 stitch purlwise with yarn in back
- k2tog: knit 2 stitches together
- ssk: slip, slip, knit (decrease)
- RS: right side
- WS: wrong side
- MC: Main Color
- CC: Contrast Color
- M1L: Make 1 left (increase)
- M1R: Make 1 right (increase)
Body (Worked Side to Side)
With larger needles and MC, CO 80 (84, 88, 92) stitches.
Set-up Ribbing (Moss Stitch):
- Row 1 (RS): *k1, p1; repeat from * to end.
- Row 2 (WS): *p1, k1; repeat from * to end.
Repeat Rows 1-2 for 2 inches, ending with a WS row.
Begin Slipped Stitch Ridge Pattern:
This 8-row pattern creates the textured ridges. Pay close attention to the color changes.
- Row 1 (RS, MC): k1, *sl1 wyib, k1; repeat from * to last stitch, k1.
- Row 2 (WS, MC): p1, *sl1 wyif, p1; repeat from * to last stitch, p1.
- Row 3 (RS, CC): k1, *k1, sl1 wyib; repeat from * to last stitch, k1.
- Row 4 (WS, CC): p1, *p1, sl1 wyif; repeat from * to last stitch, p1.
- Row 5 (RS, MC): k1, *k1, sl1 wyib; repeat from * to last stitch, k1.
- Row 6 (WS, MC): p1, *p1, sl1 wyif; repeat from * to last stitch, p1.
- Row 7 (RS, CC): k1, *sl1 wyib, k1; repeat from * to last stitch, k1.
- Row 8 (WS, CC): p1, *sl1 wyif, p1; repeat from * to last stitch, p1.
Repeat Rows 1-8 for pattern, working in MC and CC as indicated. Continue until piece measures approximately 20 (22, 24, 26) inches from cast on edge, ending with a WS row. BO loosely in pattern.
Sleeves (Make 2)
With smaller needles and MC, CO 40 (44, 48, 52) stitches.
Cuff Ribbing: Work in k1, p1 ribbing for 2 inches.
Sleeve Body: Switch to larger needles and work in Moss Stitch (Rows 1-2 of body) for 2 inches.
Increase Section: On next RS row, k1, M1L, knit to last stitch, M1R, k1. Repeat increase every 6 rows until you have 60 (64, 68, 72) stitches. Continue even (without increasing) until sleeve measures 18 (19, 20, 21) inches from cast on. BO loosely.
Finishing
- Fold the Body: Fold the body piece in half lengthwise, with the cast on and bind off edges meeting. The fold will be the top of the shoulder. The cast on edge will be longer than the bind off edge—this creates the asymmetric wrap effect.
- Attach Sleeves: Sew the sleeve caps into the armhole openings, matching the center of the sleeve cap to the shoulder fold.
- Seam Sides: Sew the sleeve and side seams from the underarm down to the bottom edge.
- Weave in Ends: Weave in all ends neatly.
- Block: Block to measurements. This is crucial for the slipped stitch pattern to open up and lay flat.
Collar (Optional)
For a polished finish, you can add a ribbed collar. With smaller needles and MC, pick up and knit stitches evenly around the entire front opening and neckline. Work in k1, p1 ribbing for 1.5 inches. BO loosely in pattern.
Your Whispering Pines Cardigan is now complete! Enjoy the cozy, textured beauty of your handmade garment. Share your finished project with the community using the hashtag #WhisperingPinesCardigan. Happy knitting!


