The Harbor Mist Cocoon Cardigan Free Pattern – A Drapey Knitted Wrap with Woven Sea-Glass Buttons
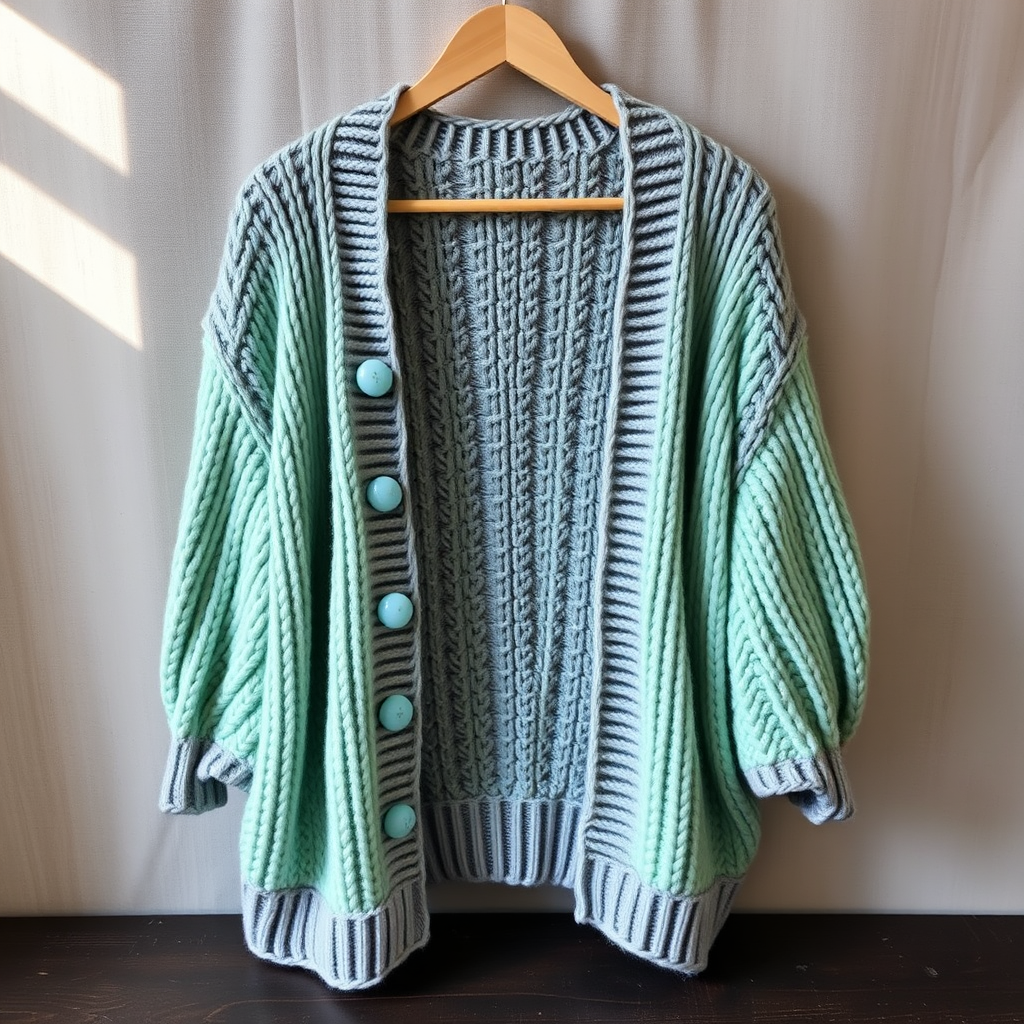
The Harbor Mist Cocoon Cardigan: A Free Knitting Pattern for a Drapey, Coastal-Inspired Wrap
Wrap yourself in the soft embrace of the Harbor Mist Cocoon Cardigan, a generously draped knitted cocoon with a delicate lace panel that mimics the ebb and flow of coastal tides. This free pattern uses a chunky merino blend and features hand-woven sea-glass buttons for a touch of organic elegance. Whether you're curled up by the fireplace or strolling along a misty shore, this cardigan is the perfect blend of comfort and style. The oversized, batwing silhouette is flattering on everyone, and the simple construction makes it an achievable project for confident beginners.
This pattern is designed to be a relaxing, meditative knit. The combination of easy stockinette and a simple, repeatable lace panel creates a beautiful texture without requiring constant attention. The result is a stunning, one-of-a-kind garment that you'll reach for again and again.
Materials Needed
Before you begin, gather your materials. This project is all about the luxurious, chunky yarn and those beautiful, unique buttons.
- Yarn: Chunky weight (bulky) merino wool blend, approximately 800-900 yards. A great choice is Malabrigo Rasta in 'Piedras' or 'Teal Feather' to capture that misty, coastal colorway.
- Needles: US 10.5 (6.5 mm) circular knitting needles with a 32-inch cable. You will also need US 10.5 (6.5 mm) double-pointed needles for creating the button loops.
- Notions: Stitch markers, a stitch holder or waste yarn, a tapestry needle for weaving in ends, and three hand-woven sea-glass buttons in frosted aqua or pale blue.
- Gauge: 14 stitches and 20 rows = 4 inches in stockinette stitch (blocked). It is crucial to check your gauge to ensure the correct finished size.
Pattern Information
Here are the essential details you need to know before you start knitting.
- Sizes: One size fits most (bust 32-46 inches).
- Finished Dimensions: Width across back: 24 inches. Length from shoulder to hem: 22 inches. Sleeve length: 18 inches.
- Abbreviations: CO = cast on, BO = bind off, K = knit, P = purl, K2tog = knit two together, SSK = slip slip knit, YO = yarn over, PM = place marker, SM = slip marker, RS = right side, WS = wrong side.
- Pattern Notes: The cocoon cardigan is worked flat in one piece from the bottom back up, then split for the front panels. Sleeves are picked up and knit in the round. The lace panel runs vertically down the center back and front edges.
Step-by-Step Instructions
Follow these detailed instructions to create your own Harbor Mist Cocoon Cardigan. Take your time, and enjoy the process!
Back Panel
- Cast On: CO 84 stitches onto your long circular needle.
- Bottom Border: Work in stockinette stitch for the bottom border.
- Row 1 (RS): K all.
- Row 2 (WS): P all.
- Repeat rows 1-2 for 4 inches, ending with a WS row.
Begin Lace Panel
Now you will introduce the beautiful lace pattern that runs down the center of the back.
- Set-Up Row (RS): K20, PM, work the lace pattern over the next 44 stitches (repeat the 4-stitch pattern 11 times), PM, K20.
- Row 2 (WS): P20, SM, work the lace pattern over the next 44 stitches, SM, P20.
- Lace Pattern (4-stitch repeat):
- Row 1 (RS): K2tog, YO, K2.
- Row 2 (WS): P all.
- Row 3 (RS): YO, SSK, K2.
- Row 4 (WS): P all.
- Continue in this pattern, working the lace panel between markers and stockinette on the sides, until the piece measures 12 inches from the CO edge, ending with a WS row.
Shape Armholes
This step begins to form the openings for your sleeves.
- Bind Off: BO 4 stitches at the beginning of the next 2 rows. You will now have 76 stitches.
- Continue in your established pattern until the piece measures 18 inches from the CO edge, ending with a WS row.
Divide for Fronts
You will now split the work to create the two front panels.
- Next row (RS): Work 38 stitches in your pattern. Place the remaining 38 stitches on a holder or waste yarn for the left front. You will now work on the right front only.
Right Front
- Continue in pattern on these 38 stitches.
- Shape Armhole: Decrease 1 stitch at the armhole edge every RS row 4 times. To do this, work to the last 2 stitches, then K2tog. You will now have 34 stitches.
- Work even (without decreasing) until the piece measures 22 inches from the CO edge, ending with a WS row.
- Bind Off: BO all 34 stitches loosely.
Left Front
- Return the 38 held stitches to your needle.
- With the RS facing, join your yarn at the armhole edge.
- Work in pattern, shaping the armhole by decreasing 1 stitch at the armhole edge every RS row 4 times. To do this, SSK at the beginning of the row. You will now have 34 stitches.
- Work even until the piece measures 22 inches from the CO edge, ending with a WS row.
- Bind Off: BO all 34 stitches loosely.
Sleeves
You'll now pick up stitches around the armhole and knit the sleeves in the round.
- Pick Up Stitches: With the RS facing, pick up and knit 48 stitches evenly around the armhole opening. PM to mark the beginning of the round.
- Sleeve Body: Work in stockinette stitch (knit every round) for 2 inches.
- Decrease Rounds: Decrease 2 stitches every 6 rounds until 36 stitches remain. To do this, K2tog at the beginning and end of the round (K2tog, knit to last 2 stitches, K2tog).
- Continue even (without decreasing) until the sleeve measures 18 inches from the pick-up round.
- Bind Off: BO all 36 stitches loosely.
Button Loops (Make 3)
These I-cord loops will be sewn onto the right front edge to fasten your cardigan.
- Using your double-pointed needles, CO 3 stitches.
- Work an I-cord for 2 inches. To do this, knit the 3 stitches, then slide them to the other end of the needle. Do not turn your work. Pull the yarn tightly across the back and knit the 3 stitches again. Repeat until the cord is 2 inches long.
- BO the 3 stitches.
- Repeat to make a total of 3 button loops.
- Sew the loops to the right front edge, spacing them evenly: one at the neckline, one at the waist, and one in between.
Finishing
The final steps will bring your cardigan together beautifully.
- Weave in Ends: Carefully weave in all loose yarn ends with your tapestry needle.
- Block: Block your cardigan to the specified measurements. This will even out the stitches and open up the lace pattern beautifully.
- Attach Buttons: Sew your three sea-glass buttons to the left front edge, opposite the button loops. Ensure they align perfectly.
- Enjoy: Your cozy, elegant Harbor Mist Cocoon Cardigan is complete! Wrap yourself in its warmth and beauty.
We hope you love knitting this pattern as much as we loved creating it. The combination of chunky yarn, simple lace, and those gorgeous sea-glass buttons makes for a truly special garment. Happy knitting!


