Harvest Moon Mini Gourd Trio Free Pattern – Crochet a Rustic Fall Charm
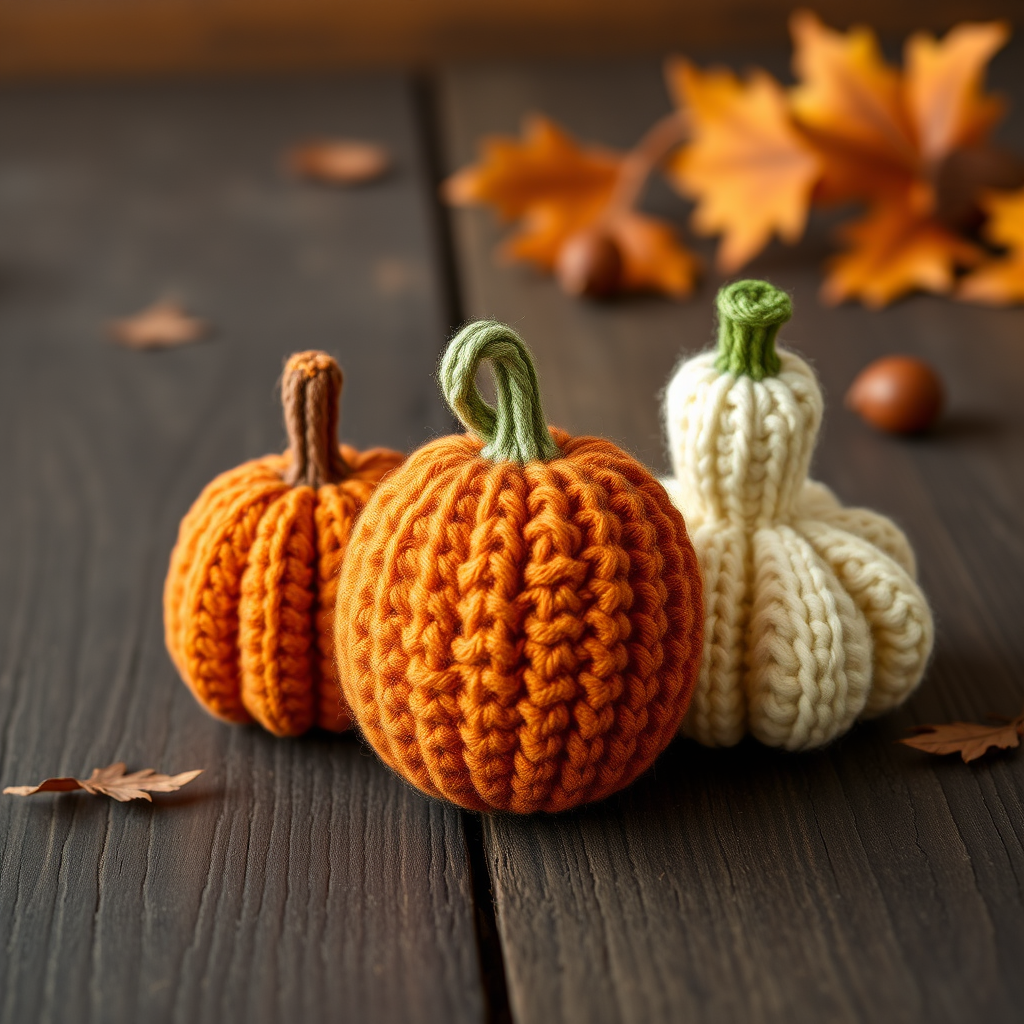
Harvest Moon Mini Gourd Trio Free Pattern – Crochet a Rustic Fall Charm
Bring the cozy warmth of autumn into your home with this delightful crochet pattern for a trio of mini gourds and pumpkins. Crafted in earthy terracotta, sage green, burnt orange, and cream, these little heirlooms are perfect for mantel displays, table centerpieces, or as charming handmade gifts. Each gourd features unique textured stitches and a whimsical stem, giving them a handcrafted, rustic feel that celebrates the harvest season. Whether you're a seasoned crocheter or a curious beginner, this free pattern is designed to be approachable and rewarding.
Materials Needed
Before you begin, gather the following supplies to ensure a smooth and enjoyable crochet session:
- Yarn: Worsted weight cotton or acrylic yarn in the following colors:
- Terracotta (for the ribbed gourd)
- Sage green (for ribs and stems)
- Burnt orange (for the classic pumpkin)
- Cream (for the butternut gourd)
- Warm brown (for the pumpkin stem)
- Crochet Hook: 3.5mm (E) crochet hook
- Other Tools: Yarn needle, scissors, fiberfill stuffing, stitch markers (optional)
Note on gauge: 4 rounds = 2 inches in single crochet. Gauge is not critical for this project, but maintaining consistent tension will help your gourds look uniform.
Step-by-Step Instructions
This pattern creates three distinct mini gourds: a classic pumpkin, a ribbed gourd, and a squat butternut-style gourd. Each is worked in continuous spirals unless otherwise noted. Let's start with the essential techniques you'll use throughout.
Common Techniques
- Magic Ring (MR): Create an adjustable loop to start your work in the round.
- Single Crochet (sc): Insert hook, yarn over, pull through, yarn over, pull through both loops.
- Increase (inc): Work 2 single crochets into the same stitch.
- Invisible Decrease (dec): Insert hook into the front loop of the next 2 stitches, yarn over, pull through, yarn over, pull through both loops.
- Slip Stitch (sl st): Insert hook, yarn over, pull through both loops on hook.
- Chain (ch): Yarn over, pull through loop on hook.
Classic Pumpkin (Burnt Orange)
Body:
Start with a magic ring in burnt orange.
- R1: 6 sc in MR (6)
- R2: inc in each stitch around (12)
- R3: (sc, inc) around (18)
- R4: (2 sc, inc) around (24)
- R5: (3 sc, inc) around (30)
- R6-9: sc in each stitch around (30) – work 4 rounds even
- R10: (3 sc, dec) around (24)
- R11: (2 sc, dec) around (18)
Stuff firmly with fiberfill.
- R12: (sc, dec) around (12)
- R13: dec around (6)
Fasten off, leaving a long tail. Weave the tail through the front loops of the remaining 6 stitches and pull tight to close the opening. Secure and weave in the end.
Stem (Brown):
Attach brown yarn to the top center of the pumpkin with a slip knot.
- Ch 5, sc in the 2nd ch from hook and in each ch across (4 sc).
- Sl st to the pumpkin top to secure the stem. Fasten off and weave in ends.
Ribbed Gourd (Terracotta with Sage Ribs)
Body:
Work in terracotta for the body.
- R1: MR with 6 sc (6)
- R2: inc in each stitch around (12)
- R3: (sc, inc) around (18)
- R4: (2 sc, inc) around (24)
- R5: (3 sc, inc) around (30)
- R6: (4 sc, inc) around (36)
- R7-10: sc in each stitch around (36) – work 4 rounds even
- R11: (4 sc, dec) around (30)
- R12: (3 sc, dec) around (24)
Stuff firmly with fiberfill.
- R13: (2 sc, dec) around (18)
- R14: (sc, dec) around (12)
- R15: dec around (6)
Fasten off and close the opening as you did for the pumpkin.
Ribbing Detail:
Thread a tapestry needle with sage green yarn. Starting at the top of the gourd, weave the yarn vertically through the body, pulling gently to create indentations. Make 5-6 evenly spaced ribs around the gourd. Secure the ends at the bottom and weave them in.
Stem (Sage Green):
Attach sage green yarn to the top center.
- Ch 6, sc in the 2nd ch from hook and across (5 sc).
- Attach to the top with a sl st. Fasten off and weave in ends.
Butternut Gourd (Cream with Sage Accent)
Body:
Work in cream yarn.
- R1: MR with 6 sc (6)
- R2: inc in each stitch around (12)
- R3: (sc, inc) around (18)
- R4: (2 sc, inc) around (24)
- R5: (3 sc, inc) around (30)
- R6: (4 sc, inc) around (36)
- R7-9: sc in each stitch around (36) – work 3 rounds even
- R10: (4 sc, dec) around (30)
- R11: (3 sc, dec) around (24)
- R12: (2 sc, dec) around (18)
Stuff firmly with fiberfill.
- R13: (sc, dec) around (12)
- R14: dec around (6)
Fasten off and close the opening.
Shaping the Neck:
Gently pinch the top third of the gourd to create a neck. Using a needle and cream yarn, tack the neck in place with a few discreet stitches to hold the shape.
Stem (Sage Green):
Attach sage green yarn to the top.
- Ch 7, sc in the 2nd ch from hook and across (6 sc).
- Attach to the top with a sl st. Fasten off and weave in ends.
Finishing Touches
Weave in all remaining ends carefully. For a charming, versatile display, consider adding a small loop of brown yarn at the top of each stem if you'd like to hang your gourds. Arrange your trio on a rustic wooden table, a windowsill, or in a decorative bowl to bring a touch of harvest warmth to any space. These little gourds also make wonderful, heartfelt gifts for friends and family. Enjoy your handmade autumn decor!



