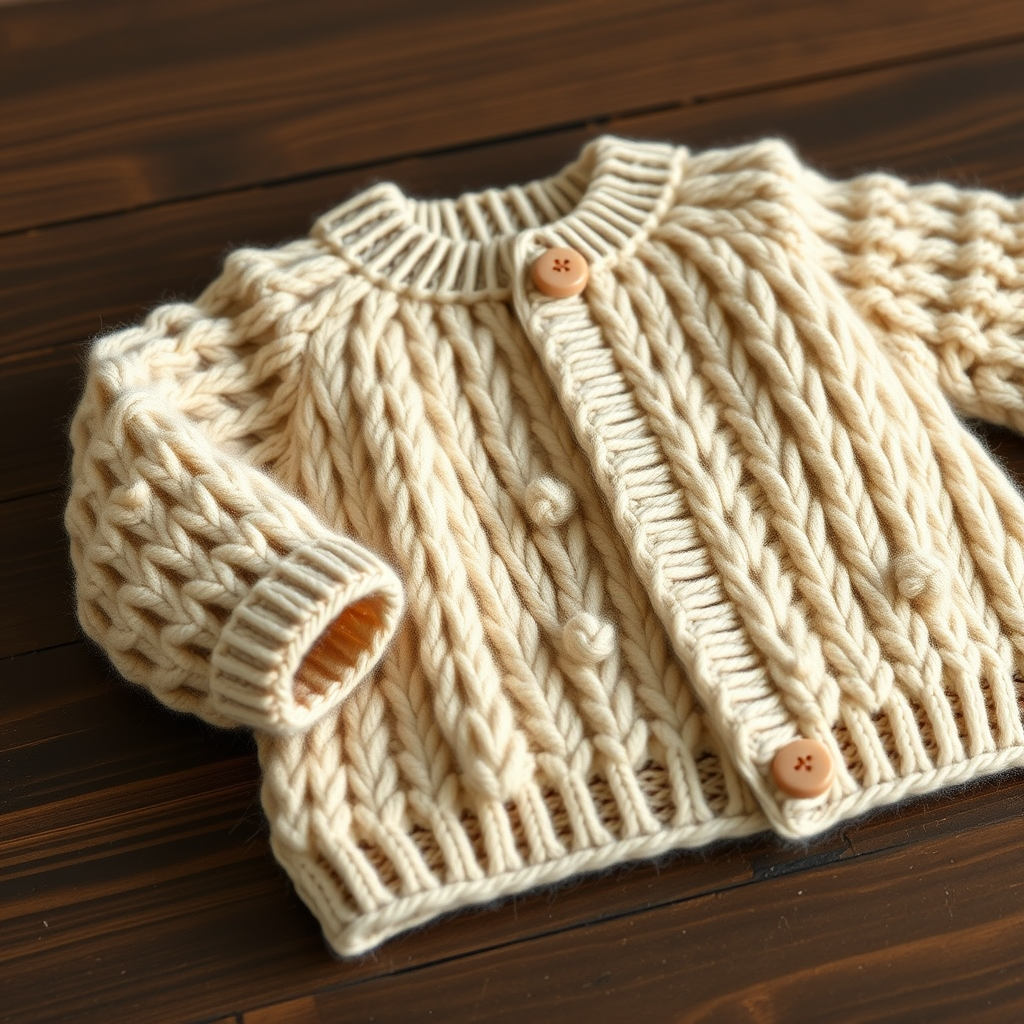
Free Pattern: Knit Tentacle Fringe Snuggle Cardigan for Newborns

Free Pattern: Knit Tentacle Fringe Snuggle Cardigan for Newborns
Introduction
If you have never knitted a single stitch before, this is the project that will make you fall in love with knitting. The Tentacle Fringe Snuggle Cardigan is a tiny newborn sweater worked from the top down in soft, striped ocean blues, finished with playful knitted "tentacle" loops at the cuffs and hem that make it look like a friendly little jellyfish. It is perfect for absolute beginners because it is small, quick, and built from just two stitches (knit and purl) plus a few simple increases. The finished cardigan is cosy and squishy, with a deep ribbed collar, a gently curved raglan yoke, and a fringe that hangs softly and freely. Every step is spelled out below, so you can pick up your needles with confidence.
Materials Needed
- Yarn: DK weight merino wool (approx. 200–220 m / 218–240 yds per 100 g skein). You will need 1 skein Aqua (A), 1 skein Navy (B), and 1 skein Pale Seafoam (C). The sample uses approximately 55 g A, 35 g B, and 15 g C.
- Main needles: 3.75 mm (US 5) circular needle, 60 cm / 24 in cable, plus a set of 3.75 mm (US 5) double-pointed needles for the sleeves.
- Ribbing needles: 3.25 mm (US 3) circular needle (and 3.25 mm double-pointed needles for the cuffs).
- Stitch markers: at least 4 (to mark the raglan lines) plus 1 extra for the sleeve beginning of round.
- Stitch holders or waste yarn: for holding the sleeve stitches.
- Tapestry needle: a large blunt needle for weaving in ends and curling tentacle tips.
- Scissors.
- Buttons: 5 small buttons, 10 mm.
- Finished size: Newborn (0–3 months). Finished chest circumference 46 cm / 18 in. Finished body length (shoulder to hem, excluding fringe) 24 cm / 9.5 in. Sleeve length (underarm to cuff, excluding fringe) 14 cm / 5.5 in.
Abbreviations and Beginner Glossary
- k – knit: insert the right needle into the front of the stitch from left to right, wrap the yarn around, and pull it through to make a new stitch.
- p – purl: insert the right needle into the front of the stitch from right to left, wrap the yarn around, and pull it through.
- st(s) – stitch(es): one loop on your needle.
- RS – right side: the outside, public face of the cardigan.
- WS – wrong side: the inside face of the cardigan.
- kfb – knit front and back: knit into the front of the stitch, then knit into the back of the same stitch before slipping it off. This makes 1 extra stitch (an increase).
- k2tog – knit 2 together: insert the needle through 2 stitches at once and knit them as one. This decreases by 1 stitch.
- m1L – make 1 left leaning: lift the bar between the two needles from front to back, then knit into the back of it. This makes 1 new stitch.
- m1R – make 1 right leaning: lift the bar between the two needles from back to front, then knit into the front of it. This makes 1 new stitch.
- yo – yarn over: wrap the yarn over the right needle to create an extra loop. This makes a small hole (a buttonhole here).
- pm – place marker: slide a stitch marker onto the right needle to mark a spot.
- sm – slip marker: move the marker from the left needle to the right needle without knitting it.
- 1x1 rib – a pattern of k1, p1 repeated, which makes a stretchy, textured fabric.
- stockinette stitch – knit every stitch on RS rows and purl every stitch on WS rows (or knit every round when working in the round).
- long-tail cast-on – a stretchy way to start stitches using a tail of yarn and the working yarn together.
- backward-loop cast-on – a simple way to add stitches by looping the yarn backward over the needle.
- knitted cast-on – a way to add stitches by knitting into the last stitch and placing the new loop back on the left needle.
- bind off – the way to finish stitches so they do not unravel: knit 2, then lift the first stitch over the second, and repeat.
Gauge
22 sts and 30 rows = 10 cm / 4 in in stockinette stitch on 3.75 mm needles, blocked. In 1x1 rib on 3.25 mm needles, 26 sts and 34 rows = 10 cm / 4 in.
Gauge matters because it tells you how big your stitches are. If your stitches are bigger than the pattern's, the cardigan will come out too large; if they are smaller, it will be too small. To check, cast on about 30 stitches on your 3.75 mm needles, work in stockinette for about 12 cm / 5 in, and bind off. Lay the swatch flat, measure 10 cm / 4 in across the middle, and count the stitches and rows inside that space. If you have more stitches than 22, go up a needle size; if you have fewer, go down a needle size.
Beginner Tips Before You Start
- Use stitch markers to track the raglan lines. The four markers tell you exactly where to increase, so you never lose your place.
- Do not pull the yarn too tight. Tension should feel relaxed; tight stitches make the cardigan stiff and hard to knit.
- Carry the colours loosely up the side. When you change stripes, leave a little slack so the edge does not pucker.
- Count your stitches after every increase row. The stitch counts in parentheses are your safety net.
- Work a gauge swatch first. It takes 20 minutes and saves you from re-knitting the whole cardigan.
- Keep the tentacle loops loose. They should hang softly, so do not tug them when you bind them off.
Step-by-Step Instructions
Colour Sequence
Work the cardigan in 4-row stripes: 4 rows Aqua (A), 4 rows Navy (B), 4 rows Pale Seafoam (C), repeating. Carry the colours up the side of the work loosely. The ribbed collar, bands, and ribbing are worked in A only. The tentacle fringe alternates A and B.
Collar (worked flat on 3.25 mm needles)
Cast on 72 sts with A using the long-tail cast-on.
Row 1 (RS): k2, *p2, k2; repeat from * to end. (72 sts)
Row 2 (WS): p2, *k2, p2; repeat from * to end. (72 sts)
Rows 3–12: Repeat Rows 1–2 five more times, until the collar measures 3 cm / 1.25 in, ending on a WS row. (72 sts)
Row 13 (RS, buttonhole row): k2, p2, k2, yo, k2tog, work in rib to end. (72 sts)
Rows 14–15: Work in rib as established. (72 sts)
Do not bind off. Change to 3.75 mm needles.
Yoke Set-Up (raglan)
Change to the 3.75 mm circular needle and begin the stripe sequence, starting with A.
Set-up row (RS): k12 (right front), pm, k10 (right sleeve), pm, k28 (back), pm, k10 (left sleeve), pm, k12 (left front). (72 sts)
Row 1 (WS): Purl all sts, slipping markers. (72 sts)
Raglan Increases
Row 2 (RS): *Knit to 1 st before marker, m1R, k1, sm, k1, m1L; repeat from * 4 times, knit to end. (80 sts)
Row 3 (WS): Purl all sts. (80 sts)
Rows 4–29: Repeat Rows 2–3 thirteen more times. (184 sts)
Stitch counts after the yoke: right front 26, right sleeve 38, back 56, left sleeve 38, left front 26. The yoke depth measures approx. 10 cm / 4 in from the collar.
Divide for Body and Sleeves
Next row (RS): Knit to the first marker (right front), remove marker, slip the next 38 sleeve sts to waste yarn, cast on 4 sts underarm using the backward-loop cast-on, remove marker, knit across the back 56 sts, remove marker, slip the next 38 sleeve sts to waste yarn, cast on 4 sts underarm, remove marker, knit the remaining 26 left front sts. (116 body sts: 26 + 4 + 56 + 4 + 26)
Body
Continue in stockinette stitch and the 4-row stripe sequence, working flat.
Rows 1–42: Work even in stockinette and stripes until the body measures 14 cm / 5.5 in from the underarm, ending on a WS row. (116 sts)
Next row (RS): Knit all sts, increasing 4 sts evenly across the row (kfb into every 29th st). (120 sts)
Change to 3.25 mm needles and work in 1x1 rib (k1, p1) for 3 cm / 1.25 in. Bind off all sts in rib pattern.
Sleeves (make 2)
Slip the 38 held sleeve sts onto 3.75 mm double-pointed needles. Join A at the underarm, pick up and knit 4 sts along the underarm cast-on edge. (42 sts) Pm for the beginning of the round.
Rounds 1–30: Work in stockinette stitch in the round, continuing the 4-row stripe sequence, for 10 cm / 4 in. (42 sts)
Decrease round: K2tog, knit to the last 2 sts, k2tog. (40 sts)
Rounds 32–33: Work even in stockinette. (40 sts)
Change to 3.25 mm double-pointed needles and work in 1x1 rib for 2.5 cm / 1 in. Bind off all sts in rib pattern. Repeat for the second sleeve.
Button Band (left front)
With 3.25 mm needles and A, pick up and knit 1 st for every row along the left front edge (approx. 40 sts). Work 4 rows in 1x1 rib. Bind off in rib.
Buttonhole Band (right front)
With 3.25 mm needles and A, pick up and knit 1 st for every row along the right front edge (approx. 40 sts). Work 2 rows in 1x1 rib.
Buttonhole row (RS): Rib 3, *yo, k2tog, rib 7; repeat from * 4 times, yo, k2tog, rib to end. Work 2 more rows in rib. Bind off in rib. Sew 5 buttons to the left front band opposite the buttonholes.
Tentacle Fringe (cuffs and hem)
The tentacles are short knitted loops worked directly into the bound-off edges. Use alternating A and B.
Hem tentacles: With RS facing and 3.75 mm needles, pick up and knit 1 st in each bound-off stitch along the hem. (120 sts)
Row 1 (WS): Purl. (120 sts)
Row 2 (RS): *Cast on 12 sts using the knitted cast-on, bind off 12 sts, k1; repeat from * to end. This creates 120 short hanging loops (tentacles).
Bind off all remaining sts. Cut yarn, leaving 10 cm tails. Using a tapestry needle, thread each tail through the tip of its tentacle and pull gently to curl the end slightly. Alternate A and B for every other tentacle.
Cuff tentacles: With RS facing and 3.75 mm needles, pick up and knit 1 st in each bound-off stitch around each cuff. (40 sts per cuff)
Row 1 (WS): Purl. (40 sts)
Row 2 (RS): *Cast on 10 sts, bind off 10 sts, k1; repeat from * to end. (40 tentacles per cuff)
Bind off all remaining sts. Curl the tips as for the hem. Alternate A and B.
Assembly and Finishing
Weave in all ends. Thread each yarn tail onto the tapestry needle and run it through the back of several stitches, then trim close to the fabric. Do this on the WS so the ends are hidden.
Block gently to measurements: chest 46 cm / 18 in, body length 24 cm / 9.5 in, sleeve length 14 cm / 5.5 in. Pin the cardigan flat on a towel, mist it lightly with water, and let it dry completely. Do not press the ribbing, and do not steam or flatten the tentacle loops — they should hang softly and freely.
Sew the buttons securely to the left front band, opposite the buttonholes, using matching thread or yarn.
Pro Tips and Variations
- Change the colours: Swap the ocean blues for sunset pinks, greys, or a single solid colour. Keep the 4-row stripe rhythm or work random-width stripes for a different look.
- Adjust the size: For a slightly larger baby size, add 2 more raglan increase repeats (Rows 2–3) to add 16 sts, then follow the same divide and body instructions.
- Substitute yarn: Any DK weight yarn will work, but choose a soft, non-scratchy fibre like merino or a merino-cotton blend for newborn skin. Always re-check your gauge.
- Simplify the fringe: If the tentacles feel intimidating, leave them off the cuffs and add them only to the hem, or replace them with a simple picot bind-off for a quicker finish.