Home Decor Crochet Patterns
Enchanted Poinsettia Cutlery Holder Free Pattern
Anonymous
•
July 10, 2026
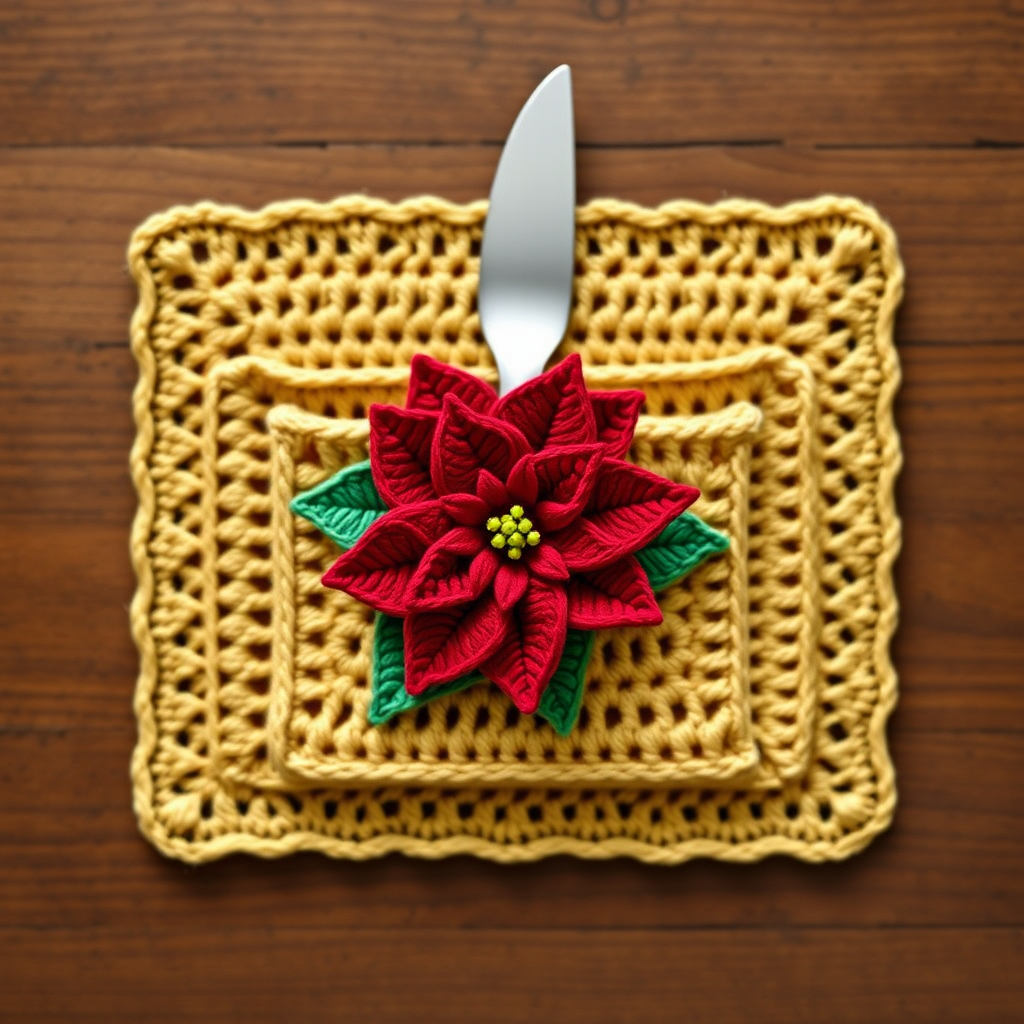
Enchanted Poinsettia Cutlery Holder Free Pattern
Introduction
Add a touch of magic to your holiday table with this Enchanted Poinsettia Cutlery Holder. This whimsical design combines intricate crochet techniques with festive flair, making it perfect for a memorable Christmas feast. Whether you're hosting a family gathering or a cozy dinner with friends, this cutlery holder will surely impress your guests and elevate your table decor.
Materials Needed
- DK weight, 100% cotton yarn in the following colors:
- Red (for the poinsettia flower)
- Green (for the leaves)
- Gold (for the cutlery holder base)
- 3.5 mm crochet hook
- Scissors
- Tapestry needle (for weaving in ends)
Step-by-Step Instructions
1. Begin with the Poinsettia Flower
- Using the red yarn, create a magic ring.
- Round 1: Chain 1, then work 8 single crochet (sc) into the magic ring. Join with a slip stitch (sl st) to the first single crochet. (You should have 8 stitches total)
- Round 2: Chain 2, then work (double crochet (dc), chain 1, double crochet) in each stitch around. Join with a slip stitch. (You should have 16 stitches total)
- Round 3: In each chain-1 space from the previous round, work (single crochet, half double crochet (hdc), double crochet, half double crochet, single crochet). Join with a slip stitch. Fasten off the red yarn.
- Attach the green yarn to the base of the flower and work a round of single crochet behind the petals to create a leaf effect. This will give your flower a more natural look.
2. Cutlery Holder Base
- With the gold yarn, chain 21.
- Row 1: Single crochet in the 2nd chain from the hook and in each chain across. (You should have 20 stitches total)
- Rows 2-30: Chain 1, turn your work, and single crochet in each stitch across for 29 more rows. This will create a rectangular piece that will serve as the pocket for your cutlery.
- Once you have completed the 30 rows, fold the rectangle in half lengthwise. Use single crochet to join the sides together, forming a pocket for your cutlery.
3. Assembly
- Position the poinsettia flower on the top center of the pocket you just created.
- Using your tapestry needle and the red yarn, sew the flower securely onto the pocket.
- Finally, weave in all ends securely to ensure your cutlery holder is neat and tidy.
Conclusion
Your Enchanted Poinsettia Cutlery Holder is now complete! This delightful piece not only serves a practical purpose but also adds a festive touch to your holiday table setting. Enjoy your crafting and have a wonderful holiday season!